Pages

Saturday 11 July 2020

Let me tell you a story...

Sitting comfortably?

Got a drink?

Good. Ok. So. Back in the day... which as you should know if you've been reading this blog a lot is an oblique way of saying 'before most of you were born'... there was no Critical Rôle, no Acquisitions Inc, no Taking 20.... we didn't have Zoom, we didn't have Roll20, Fantasy Grounds, FoundryVTT or even TTS. No video. No personal web pages. Hardly any web pages at all, in fact. At the time we're talking about, we didn't even have images: the Internet was 80-character fixed-width text on a terminal.

And you're all going 'hush, old-timer, this is turning into the Four Yorkshiremen sketch...'. right about now. Well, hush yourselves, and listen. Sure, we didn't have CR, and endless YouTube feeds and blogs. We had Usenet - kind of imagine it like Facebook Groups or Tumblr but plain text and better organised, ok? And on Usenet there was, originally, a group called rec.games.frp, where 'rec' meant it was in the recreational hierarchy, and the rest should be obvious. Due to volume of traffic, that split around 1991-2, and (A)D&D postings wound up in rec.games.frp.dnd, and there were other groups for various other games and genres, plus rec.games.frp.archives, which was a moderated group where various postings of a less ephemeral nature went.

As you can probably imagine, finding opponents outside of your own face-to-face circle proved something of a challenge. I was lucky in that I managed to jtoin a play-by-email game advertised on rec.games.frp run by a fellow Englishman called Phill Everson, the Mariner campaign, set in the Forgotten Realms. There I played a gleefully unrepentant and charismatic thief called Philippa of Mistledale (fans of 80s BBC TV may remember a character from 'Bergerac' called Philippa Vale, on whom she was heavily based) and ran into a couple of characters with whom she formed something of a bond within the party, Fost Darkwing (played by Mark Little) and Jade Skye (played by Rob Holden).

When Mariner faded out, I decided to run a campaign set in my own world of Altrion, and invited Mark and Rob along into what became the Midnight's Bane campaign, again run over email with the two of them, my friend Janet from the Twin Cities (who I'd actually 'met' on a different Usenet group) and a  local friend here in the UK. Back them, email wasn't this instant thing: Alan and later Rhodri were local to me, so we all had the advantage of Cambridge's decent connectivity; Mark was on the UK academic network, so he was OK. Janet was working for a small US company who dialled out for email every four hours or so, and Rob - Rob was at Plymouth State College in New Hampshire. PSC dialled in to the University of New Hampshire for email once or maybe twice a day at first. I'd stay late at work for a couple of days after I'd mailed out a turn, so that their noon Eastern Time dialup had time to filter through to me (via several more hops and about an hour or two) and I could catch an email and reply to him, and maybe if PSC did a midnight mail run it would be waiting for him in his morning.

That ran for a good few years, and... well...

The closest thing the community had to YouTube live play sessions? Writing the games we played up on rec.games.frp.archives. There were a number of popular write-ups on there - you can usually find them with the subject tag "STORY:" - such as Thomas Miller's massive "Adventurers" series. Tim's (no surname I know of) "Assassins", many chronicles by Jason Zavoda, and my own "Midnight's Bane". Posting for the latter was slow, because I wrote for players in the present tense, and rewrote each episode in the past tense for posting to the group. But - these were the Critical Rôle, Save or Dice, you name it, of the day, in terms of getting accounts of D&D play in front of what was probably an over 50% university student audience. I like to believe that the likes of Thomas, Jason, us, and the other contributors to the group may have inspired some people to play, to try their hand at writing.

"The party are camped by the X"
It certainly taught me how to write, starting from my fiest steps in the Mariner campaign, how to pace, how to describe things for people when you had no maps bar those you could draw in ASCII characters, and no dice. It also made me new friends: Mark and Rob were both excellent role-players, and contributed by their deeds, character ideas and questions about the world into making the setting of Altrion what it became. D&D at its best is collaborative storytelling and creating legends with friends, and we did this for several years.

The Midnight's Bane campaign, and the other face to face games, fizzled out in the mid-90s when I got married and then moved away from the group I DMed regularly: also I'd managed (in my usual 'plan the high spots and wing the rest' approach) to plot myself into a corner with the PBEM group and I couldn't figure out a way to continue that I was personally happy with, so I kept putting it off.

Enter, a couple of decades later, this blog, after I fell down a YouTube rabbit hole that ended up with Critical Rôle, and rediscovered the fun of D&D. I got in touch with the old party, all of whom were keen to resume. Some emails were missing, but after a mammoth archive and reconstruction effort we managed to pick up a turn or two before things originally stalled...

Rob Holden - 1961-2020
"Drax Stormwind"
Rob, sad to say, was battling stage 4 pancreatic cancer. He passed away this last Wednesday.

One of my bigger regrets is that we never got to meet. We spoke on the phone during a weekend where we ran a huge battle involving both the face to face and email parties, and we exchanged emails off and on in the intervening years. He was always cheerful, imaginative and willing to roll with the plot (even when he discovered his character Drax's mother, Sirina, was working for the major villains!). You probably never knew him, but if you followed the D&D groups on Usenet in those days at the start of the '90s when there was a thriving community there, if you read the Midnight's Bane stories, you read his words, you knew his character 'voice'. In a small way, he was part of the 'actual play' trend of that time.

In this connected world, our friends aren't always people we've met in person. Even more so now, perhaps, when it's easy to make contact across the 'Net (and right now, harder to do so in person).

Tell your friends, wherever they are, what they mean to you. You never know when you'll get another chance.

Still got that drink?

Good.

A toast, then.

To friends near and far away, and to the memory of a fine friend, rôle-player and father: Rob Holden.
Thursday 16 April 2020

Virtual roleplaying part 8: combat aids

Deep breath, because today we're going to install a module that does make some pretty majorly useful (despite the name) changes to FVTT from a gameplay point of view.

It's Minor QoL Improvements (MQoLI), and it kind of does what it says on the tin (a reference that may be lost on my US readers - sorry!).

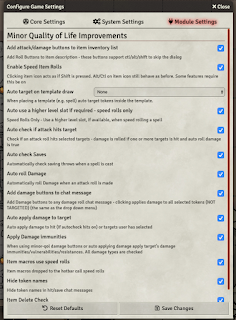
Ok - hit ESC and back out (in the GM client) to Setup, Add-on Modules, Install Modules. The manifest URL is here, and the docs are here - neither of those links is likely to change. Let's install it (this is the last time I'm going to remind you how!), relaunch the world, enable the module from Manage Modules, and have a look at its configuration (Configure Settings, Module Settings).

There is an absolute boatload of stuff here, some of which covers stuff we haven't got into yet (but will very shortly).

The author (tposney on Discord) is very responsive to bugs as well - I found a very minor issue in what I'm about to demonstrate to you (only on Macs) the other night, and it was fixed before I started editing this post again the following morning.

For now, though, let's just accept the defaults, and start another combat encounter with poor beleaguered Alaric and a couple of goblins.

Player view
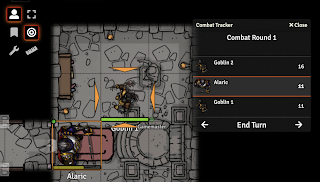
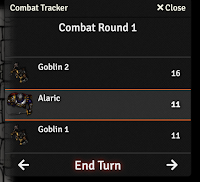
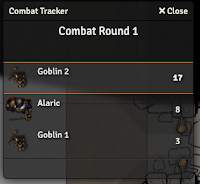
Fire up Alaric in his own browser window, pop out the Combat Tracker, click to roll his initiative.

(Note that if you need to fiddle initiative (not that I'm ever suggesting GM's do that, of course), you can right click on a line in the Combat Tracker, select Modify and change their roll.)

Lucky old Goblin 2 gets to go first, so let's work through this like we did before. As the GM, select Goblin 2, right click on Alaric to bring up the Combat HUD, select the target icon, then double-click on the goblin to bring up his character sheet, go to the Features tab.

Mouse over the icon for the short bow, and click on it now it's turned into a d20...

Now, as before, check the chat window.

Neat, huh? OK. That's it for Goblin 2, so click on the right arrow at the bottom in the Combat Tracker to advance to Alaric.

In the Player client, we can move Alaric to attack Goblin 1 (in my map, that's up arrow then right arrow, or numeric pad 9 to move up and right), then click on the target icon (2nd row of the left hand icon bar) and select the Goblin. As before, the targeting arrows appear.

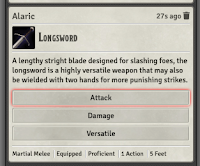
By now you should have Alaric's longsword on the quick bar down the bottom. Note that if you did so before we installed the Minor QoL Improvements module, you will need to drag it off the quick bar and re-add it by dragging from his inventory, because the underlying code for the action has changed now we added the module.

So, that done, click it or hit the appropriate key in the number row, and let's beat up on the goblin.

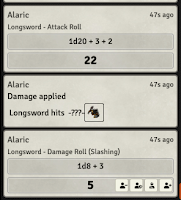
Notice how, with MQoLI loaded, Foundry does the whole thing for you, working out if you've hit and what damage you do. (There seems to be a slight glitch where it doesn't say what you've hit, which I'm clear on why (see, I don't know everything).

This screen grab is from an
earlier session.
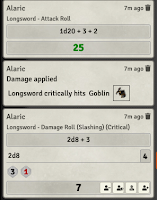
Even cooler, if your roll is a critical, Foundry automagically applies critical damage, and if you click on the dice math line (e.g. 2d8 + 3) it will open up to tell you what it did to get to that result.

Cooler yet (just how cool can we get?), if you hold down Alt (Option on the Mac) as you click on the attack, it automatically rolls with Advantage. If you hold down Control (Command on the Mac), it will roll with Disadvantage.

Right. One more thing for this time out. Let's add another character quickly (so quickly, I'm going to skip stuff I'd do if I was taking it seriously). Meet Fenella, one of Alaric's adventuring companions. For the purposes of this exercise, she has the spell Burning Hands (typical of her!), so let's restart the combat, and see what Foundry lets us do when she casts it.

As before, let's assign Owner rights on the character to our player (Actor, Configure Permissions) - note that a player can control, more than one character.

I've dragged the spell icon from her book onto the quick bar, so let's click it...

Now. What happens here takes a bit of getting used to, and you will find yourself popping into the GM window to delete spell area templates for a while till you stop getting your mouse clicks in a knot. (To do this, select the Measurement Controls icon on the left, then the trash can, then follow the prompt to get rid of all templates, or you can click on one and hit the delete key.)

When you click on the spell button, an area effect template outline in black will attach itself to your cursor. Do NOT at this point click. You can move it by moving the mouse, and rotate it with the mouse wheel. When you're happy with the location, THEN click, and you will see the targeted squares highlit in colour.

If you have the right option set in MQoLI, it should auto-target and damage the
affected critters. If it doesn't, you can target them manually with the Targeting tool, click on the spell name in her spell book and then the Damage button, and she will automatically roll damage in the chat window, the target will try and make a save AND one spell slot will get crossed off her sheet.

Again, the best I can suggest here is have a play: you'll make lots of mistakes while you're getting used to things, but if you have enough screen real estate to work with a GM and a player window onto Foundry, you should be able to get your head round how combat work and how MQoLI improves it, as well as what players can do versus what you as the GM can.

Right.

Next time we're upgrading to 0.5.3, since it seems to be pretty stable now, and having a look at what's changed. 0.5.4 is out, with even more shininess, but that's very much bleeding edge and I wouldn't in general use even numbered versions for a 'production' game.

Stay safe, and roll good dice! (or have Foundry roll them for you!)

Upcoming posts (subject to change as I go):
  • part 9: upgrading to 0.5.3
  • part 10: player communication
  • part 11: D&D Beyond


Friday 3 April 2020

Virtual roleplaying: administrivia

Ok. Some adminiatrivia.

Firstly, our noble leader, Atropos on Discord, has announced Foundry Virtual Tabletop has an official release date of Friday, May 22 and will be available to purchase starting Friday, April 19 from the official website. More details in the video on the right.

Next up, just to clarify - this series of tutorials are currently running Foundry 0.5.1. There are new features in 0.5.3 (released this last Monday) that I will mention in passing, but I'm giving the new version a week or so to stabilise, and modules get updated, before I update the test server. As per usual, I'll break the live server first, swear a lot, and then do it right for you folks on the tutorial server. There will also be a 'updating to 0.5.3' post.

Away from gaming, I am currently about to hit Holy Week at church: normally this is a fairly non-busy time, but we are running virtual church services, and I'm responsible for video editing. We have services every day from Sunday coming up until Good Friday and then again on Easter Sunday, and I'm also in the middle of setting up a limited company etc for my new job that starts at the end of April, With those in mind, I can't guarantee these posts will be as regular as before, for which I apologise.

Stay safe, and there should be another tutorial out later today.

Sunday 29 March 2020

Virtual roleplaying part 7: connecting a player, My First Encounter

Time to break out of your lonely existence and let the players connect! Actually, for now, you get to test it yourself, but the principle will be the same.

Make sure you have a scene active in your GM connection in FoundryVTT, then go to the Settings right hand menu, select Invitation settings and (for now) copy the Local Network link. We'll cover players from outside your network in a couple of posts time.

Start up another browser: if you're running on Windows or Mac, the FoundryVTT app hosts the game and (probably) your GM connection [if you're running on a dedicated server, you'll already be connected in one browser, and you need to connect to the game again in a separate browser]. Either way, paste that link into your browser and connect. You should see a familiar dialog, so select the Player name and enter the access key you set for it, then hit Join Game Session. Two screens will help here if you have them!


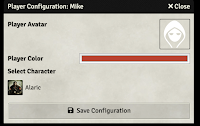
The first thing you'll see is your Player Configuration dialog - all you really can do here is change the colour of your player icon, and if the GM has given you permission, upload your player portrait.

Once you click Save Configuration, you'll find yourself in the dark :D

Go to the GM session, drag that player's character actor onto the map, and give them a torch like we did last time (don't forget to hit Update Token). In the player window you'll see them appear and the scene light up.

Drag the goblins onto the map in the GM window, if they aren't already there.

It's not that easy to watch when you're controlling both, but you will see a little dot with the player's colour that indicates where their cursor currently is - this is useful if one of you wants to point something out to the other. If it gets annoying, the GM can turn it off (somewhere, I'm sure. I saw that config option and now I can't find it!!!).

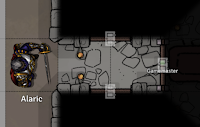
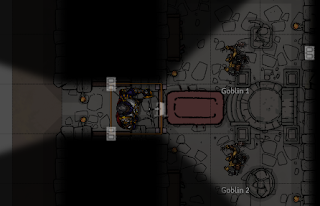
Anyway, here's Alaric, as before, in the temple entrance with a torch, but this time under player control.

You can use the cursor keys or the numeric keypad to move him, and Control+scroll wheel to rotate him, as before. So, like we did before, let's stroll up to that ominous looking door...

... and open it by left clicking on the little icon.

Cue dramatic music! (Yeah, yeah. It is supported. We'll get to it later!)
Player's view.
GM's view with no icon selected.
It's combat time!

Go to the Gamemaster window, make sure you've selected the topmost icon on the left (Basic Controls), and Select Tokens next to it, and drag a box round all the active tokens. Bring up the Combat Tracker in the right hand menu (second icon from the left) and right click on any of them, to bring up the Combat HUD (of which more shortly) and click the bottom right icon to add all the tokens to a new Encounter. (By the way, if you Control-click on the Combat Tracker icon, it will pop out into a window you can move about.)

Click on the icon to the right of the +, which will roll initiative for the NPCs.

If you go to the chat window (in either window, but let's do it in the player's browser), you'll see their rolls. Now bring up the Combat Tracker in the player's window as well, and click on the d20 next to his name to have Alaric roll his own initiative.

Finally, back in the GM window, hit Begin Combat.

If you click on the currently active monster (in my case Goblin 2) it will select and highlight. Let's pick on Alaric: right click to bring up the combat HUD on him, left click on the target icon (bottom left) to target him.

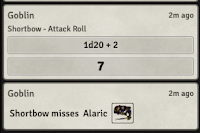
Bring up the goblin's sheet, click on his bow icon to roll an attack. The shortbow card will come up in chat, (with Attack and Damage buttons in the GM window but not the player's): click Attack.

We hit (just! Alaric is AC18) Roll for damage.

It's not that I'm picking on the poor guy, my dice just don't like him much.

Before we carry on, let's pause and take stock of the things that, in our excitement to get started, we're probably now noticing that aren't as good as they could be.

For starters, Foundry doesn't tell you if you've hit or not, as I commented in a previous post. It also doesn't apply the damage. Both of these we can fix later with a module. For now though, we can edit his current hits by bringing up Alaric's combat HUD as the GM by right-clicking, and editing the big number at the bottom (not the one top left: that's his height above ground level).

While we're here, click on the gear wheel: this brings up the familiar token config dialog. Go to Resources, set Display Bars to Always, and Bar 1 to attributes.hp. Save Configuration, and do the same for the goblins. Here you may berate me for not telling you to do this in their Prototype Token config earlier (so do it now - I'd really like a master Prototype Token where I could turn this on for all tokens, if you're listening, Atropos.)

Now at least all our combat participants have health bars. We can move Goblin 2 out of sight of the door and click the right arrow on the encounter tracker to advance to the next combatant.

Alaric's turn. Being at least somewhat of the tank persuasion, he'll go whack Goblin 2. Over to the player window.

Now. Because he's not the GM, he can't bring up the HUD on a token he doesn't control, so to target the unfortunate goblin, we select the target icon (second down, second column on the left) and click on Goblin 1.

It's clobbering time!

Woah. Hold on a sec...

Remember we discussed the button bar last time? Ok. Double click to open his sheet, go to Inventory and drag the longsword icon to the bar, close the sheet. Now when we hit the button (or the appropriate key on the number row, the item card appears in chat with Attack/Damage buttons. Alaric rolls to hit...

He hits (after several attempts - I never said this wasn't a rigged demo!) and gets to do damage. As before, this doesn't get updated automatically, so we have to do it by hand, as the GM, by editing the hits in the combat HUD. Alaric's player can now hit End Turn on the Combat Tracker, and it's Goblin 1's turn.

Right. Hopefully you begin to get the idea.

We're going to leave it there for now: feel free to play through a bit more of the fight and explore what the HUD does, roll for Advantage etc. There's no substitute for having a play, and you can always wipe the encounter and start again.

Next time, having demonstrated how much nicer life could be than this, we're going to install a module to help with combat.

Aside: I am very much of the opinion that it's worth learning how to do things in completely vanilla FVTT before you start adding modules, as a) you gain a better understanding of core concepts, and b) you get a better appreciation for which modules scratch your personal itches.

Till next time. Stay safe, and roll good (virtual) dice.

Upcoming posts (subject to change as I go):
  • part 8: combat helper module(s)
  • part 9: player communication

Saturday 28 March 2020

Virtual roleplaying part 6: images, tokens, monsters, light

Right. Diving straight in, let's go to the Actors list (RH icon menu, 4th entry) and drag our lonely actor (Alaric in my case) out on to the map.

All very well, but the mystery man token isn't particularly inspiring, any more than the matching portrait is, so let's click on him to select him if he isn't, hit the Delete key to remove him from the map, and do something about that. Before you do, this is the point where you might want to have a think about how you want to organise your tokens and images on disk.

On the Mac, your User Data folder is in ~/Library/Application\ Support/FoundryVTT/Data/ - in Windows it's in %localappdata%/FoundryVTT/Data/ (don't look at me, I'm a Mac user) and in Linux it's wherever you put it (typically ~/foundrydata/Data/). Under mine I've created an images/ directory with subdirectories for tokens/ and portraits/ for the ones I upload. You can copy stuff in by hand using your operating system tools (easier when you're dealing with lots of files), or use the upload feature on Foundry. 


Image licensed under CC BY 3.0 by David Revoy
Once you've done that, go back to the Actor tab, click on Alaric's name to bring up his sheet. If you click on his portrait, you can replace it with another image via the usual FVTT file dialog - navigate up to the top of User Data, find your portraits/ folder and select the file.

That looks much better. While you're there, click on Prototype Token.
Ok - important note here. The Prototype Token is the one all copies of this Actor will start out with - not important for a character, but monsters are also Actors, and when you drag multiple copies of them out onto the map, they will all pick up the Prototype Token to start with. You can edit them later, of which more in a bit.

Right. So, assuming we have a handy token image for Alaric, let's assign it to the token (if you don't, it'll use the portrait).  Click on the image tab, find a token in the file browser, don't forget to hit Select File, and there you have it. On the Character tab, lets set Display Name to always, and hit Update Token.

We'll cover other useful things you can do from here in a bit, but for now that's it.  Drag your token back onto the map and admire it.
When you click on your token, you'll notice that he doesn't see much. That's because it's dark, and he's human. So lets really ruin his day, by giving him some opponents who can see in the dark.

First off, though, let's get ourselves a bit more organised. Go to the Actors tab, select Create Folder, and create two folders, one called Parry, one called Monsters. Drag your character into the Party folder, then open up the Compendiums tab, single click on Monsters (SRD) and find the goblin. Click back to the Actors tab, and drop the goblin from the Monsters window into the Monsters folder. You can get more adventurous with this organisation as you see fit, obviously.

Now for some fun.

Open the goblin's Sheet if it isn't, click on Prototype Token, set Display Name to Always, and then go to Vision. Goblns have 60' darkvision in 5E, so check Has Vision and enter a value of 60 in Dim Vision (Grid Units are feet in D&D, not squares). Update Token, and now all goblins you drag from there can see in the dark.

Muahaha. Poor Alaric.

Now let's do exactly that - drop two green-skinned nasties onto the map by dragging the image from the Actor panel twice.

Three things you'll immediately notice.
  1. they're almost certainly facing the wrong way.
  2. they're both called 'Goblin', meaning if your players want to tell you which one they're referring to, they're going to be saying things like 'the one by the statue - no, the other one....'
  3. the map is lit around each of them when you select their token, for 60', but they don't see through the walls we created a few posts ago - remember those? Neat, huh?
1 is an easy fix: select a goblin, hold down Control and use the mouse wheel to rotate it.

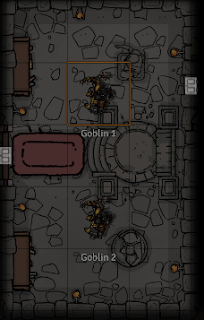
2 is only a little bit harder. Double click on one of them. Notice that where the master sheet said "Prototype Token", this one only says "Token". Any change you make here only affects this one token. So let\s change its name to Goblin 1, and the other to Goblin 2. (Other goblin names are available.) 

Note one useful side effect here - if your custom monster is called (say) "Cult of <some God your players can't know about yet> Acolyte', here's where you can change it so they don't know yet. 

Poor Alaric is about to wander into the temple in the dark. Let's help him out by giving him a torch. Hit Escape to deselect the goblin so you get back to the all-seeing GM view, then double click on his token to bring up his sheet, go to Token, go to Vision. This time, set Emit Dim to 40, and Emit Bright to 20, for a standard D&D 5E torch light source that will move with him. Remember to hit Update Token, and close.

If you click on Alaric now, you'll see he is emitting light. (In 0.5.3 you'll be able to change the colour of the light, so that he has an even more dramatic orangey-red torch.) But, because it's only set on that token, not on the prototype, the next time you drag him onto a map he won't have it.

Move him by dragging him, or using the cursor keys or the numeric keypad, and watch how what he can see, and what's illuminated, changes. Walk him up to a door, and left click on the little door rectangle icon until it changes to open.

How cool is that?

Ok. That's it for tonight.

Upcoming posts;
  • part 7: player connections, movement, targeting
  • part 8: more useful modules.
Tokens: Devin's Token Site has some great free token packs. While you're there, the for-pay ones are mostly only $5 each, and they're excellent. Show the man some love.


Virtual roleplaying part 5 - players and characters

If you look in the bottom left of your Foundry screen, you will notice a sad lack of players, logged in or not. So let's rectify that.

All your players need to connect is a browser, preferably Chrome or Firefox, a working network connection that can reach your installation of Foundry, and for you to create them a player. Off then, to the Game Settings menu again (far right, remember), and hit Configure Players.


Once you're in this dialog, hit Create Additional User, give them a name and an Access Key (password to you and me, although apparently not as secure, so usual advice about not reusing passwords from elsewhere definitely applies!): for now we can leave the Permissions Level as PLAYER (some of this may change in version 0.5.3, I gather) and hit Launch Game Session, which will restart your game.

If you look in the bottom left, and hit the downward pointing triangle to reveal the list of players, you now have a new player (in my case, me).

Right clicking on their brings up a menu: if you select Player Configuration you can assign them a colour, and a character....

But wait, we don't have any characters yet!

Let's go to the Actors tab (fourth one along on the right hand icon menu), and hit Create Actor then.

Give them a name (there's a NoPrize if you know where Alaric gets his name originally), make sure the type is set to Character, and hit Create Actor.

Because we have the D&D 5E module installed, up will come a familiar looking sheet. If you have VTTA's D&D Beyond module installed, you can populate the sheet from there (and I'll cover that in a later post). However, because it helps understand some core concepts in FVTT, we're going to build his sheet by hand. 

Probably the first thing you're going to notice here is that you're madly clicking on Level or the XP and nothing happens to change their Level. So....

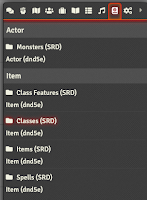
Go to the Features tab on the sheet. Then go to the Compendium tab on your right hand icon bar (second from last) and single-click (not double, however much you may be tempted! it'll just appear and disappear again if you do...) on Classes (SRD).

Up will pop a window over on the left, with a list of classes, each with an icon. Left-click and hold on the one you want (in this case, Fighter), and drag and drop it onto the Features area in the character sheet. You'll see icon appear under Class Levels, and the Level on the sheet go up to 1. Nifty, huh? (If you want to start them at a higher level, click on the little edit icon to the right of the class in the sheet, go to the Details tab and change the level).

As they're a Fighter, they also get to pick a style and the Second Wind feat, so let's go back to the Compendium tab and click on Class Features (SRD). Up will pop another window, from which you can drag the appropriate features into the Features tab. 


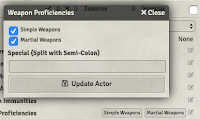
Now we can go back to the front page, and set Alaric's stats and skills. Be aware that the core D&D 5E system does not do a lot in the way of cross-updating, so just because you've given him a level of Fighter doesn't mean he's going to have the right weapon and armour proficiencies (or armour class, or hits...). Let's fix that. Click on Weapon Proficiences (bottom right area, Attributes tab, then on the little edit icon. Select the correct proficiencies, and hit Update Actor.

Then give him some items, which is done in the same way - go to the Compendiums tab, open the Items (SRD) Compendium, and drag across. Note when you do so, that (for example) when you drag across armour, it comes in listed as Not Proficient when you click on it, even if you updated the character's Armour Proficiencies. 

Again, hit the edit icon on the right, then the Details tab, and you'll find a checkbox for Proficient - click it and save.  Oddly, you don't seem to need to do this for weapons! Also, note that just because he has chain equipped, doesn't mean his AC has updated, so you will have to do that by hand as well. 

We're also going to give Alaric a longsword and a shield, and some basic kit. Note that if you want to give him multiples of something, you can edit the item and set the quantity in the Description tab.

So here he is with a collection of, erm... stuff.

Let's preview a couple of the neater features while we have his sheet open. Go to the chat window (first icon in the righthand icon bar), and then click the icon for his torches. 

You'll see a description of the torch appear in the chat window. The Use button doesn't do anything terribly handy, but it does serve as a useful way of displaying the item stats for everyone.

More useful, though, is if you do this with the longsword. A bunch of handy things happen.

First up, the item 'card' that pops up in chat has Attack and Damage buttons (as well as a Versatile button if your weapon has the attribute). So lets go ahead and click Attack,
Another dialog pops up, and we can roll for the attack, with various modifiers. The result will appear in the chat, but note that as yet we have no way of knowing what you're aiming at, so it can't yet tell you if you hit or miss.
Never mind. That's what the players have you for.

Let's assume you hit. Click on Damage, and you get another handy dialog for bringing the hurt.
And here's what those two look like in the chat window. If you click on the result, it'll tell you how it got there.

A few things to be aware of at this point. Yes, it's a pain having to bring up your sheet to click on the item to get the dialog in the chat box... That's what the button bar along the bottom is for - you can drag the item's icon to a slot, and then click it or hit the appropriate key on the number row...

And you'll get an error...


...because you don't have a token for your character on the map yet. We'll fix that next time, when we start on tokens and images and stuff.

One last thing before we finish: go back to the Actors tab, right click on your new character, select Character Permissions, and assign your new player as its owner. If you now go back to the Player Configuration dialog (right click on the player name, bottom left), you'll find your player and character are now linked.

A huge thank you to the folks on the FoundryVTT Discord, who have answered questions and critiqued these posts as I've been writing them. I'm FleetfootMike on there: feel free to comment and suggest improvements - this is as much a voyage of discovery for me as you :D

Till next time!

Upcoming posts:
  • part 6: tokens, images, monsters
  • part 7: player connections, movement, targeting
By the end of part 7, you should just about be ready to run a game, as long as you're still happy resolving hits, removing hit points etc. From part 8 on, things get clever. 

Friday 27 March 2020

Virtual roleplaying part 4 - module configuration, walls

Let's install and activate a module to fix your map, just in case. Assuming you're still in Foundry, hit ESC (top left of your keyboard) and Return to Setup. This should take you to the familiar Setup screen. Select the Add-on Modules tab, and then click Install Module.

We're going to install the GridScaler module. Copy its manifest URL (which is probably here), paste it into the form and hit Install.

[Note: there is a native grid alignment tool coming in Foundry 0.5.3, but in the short term, GridScaler is what you need - besides. it's good practice at installing a module!]

Now go back to the Game Worlds tab, launch your World and go to the settings tab on the far right.

Hit Manage modules.

You will be presented with the Module Management dialog, which has a list of all the modules you have installed (currently exactly one!): make sure the checkbox on Grid Scale Menu (yes, the module name changes for some reason) is selected, and then hit Save Module Settings at the bottom of the window.


Your game world will reload.

Now go back to the Settings menu, and select Configure Settings, and then Module settings.

In this case there are no settings for your module, but in others there may be, so it's always worth doing this when you add a new module.

I always find when I add new modules it can be less than obvious where the features have been added: in this case its easy: look on the button menu on the left, and you'll see a new icon - a spanner. The module actually has copious documentation on how to adjust your grid, so I'm just going to point you there if you need it rather than make this post even longer!

Ok. Now your grid is properly lined up, let's draw some walls!

Back to the left hand button menu, and select the temple icon. You'll notice that the second column changes to a new set, which are, from top to bottom:
  • Draw Walls (selected by default)
  • Invisible Walls
  • Terrain Walls
  • Ethereal Walls
  • Draw Doors
  • Secret Doors
  • Clone Walls
  • Clear Walls
Drawing walls is easy: left click and hold at the start, drag to where you want and let go, there's a wall. If you change your mind in the middle, right click before you finish and the wall will go away.

Now, this is all very well, but it creates a whole bunch of individual lines - what if you want them joined up? Easy. Left click and to start, then hold down Command (on a Mac, Control on anything else). Let go where you want the end point to be, do not let go of Command, click again, drag again, let go again, repeat. For the last point, let go of Command before you let go. 

Presto. If it all goes horribly wrong you can delete individual walls by double-clicking on and end point then hitting the Delete key, or the whole lot with the Clear Walls button.

Notice that I've added a point at every doorway. If you don't want the chore of drawing doors separately using the Draw Doors tool, you can turn the section of wall across the doorway into a door, by double-clicking on it.

This will bring up the Wall Configuration dialog: change Is Door? to Door, click Update Wall, and away you go. The piece of wall will change to blue, and now it's a door (which means when you go to the normal map view, you can click on it to open and close it).


Of course, if you've imported a big map from Dungeondraft, this is a LOT of clicking. There's a module that will help you. Clear the walls you've drawn so far, and using the instructions above, go and install DungeonDraft Importer (I'll wait).

Ok? Done that? Good. Now, once you've enabled the module. go to the Scenes tab on the right, right click on your scene, and select DungeonDraft Import. Note at this point it is very important your map image is imported at the right size.
Now you need to find your .dungeondraft_map file, and open it in a text editor. Copy the entire contents of the file, and paste it in the very minimal dialog box that appears in Foundry, and hit Confirm.

Et voilà, as they say in France. Complete with the doors correctly imported as doors (and yes, I forgot the secret door by the altar!)


Not that it hasn't imported the cave walls - this is currently a known limitation, so you will have to draw those by hand. It would also import any light sources you had in your map, but we'll get to that in another post!